Mechanical tool for screw inserts


The mounting tool from Juno Industries is specially designed for the easy and reliable installation of screw-in inserts (also self-tapping) in a wide range of materials. Thanks to its robust build and precise fit of the shaft, this tool ensures fast installation just underneeth the work-surface when installed in a chamfered hole, a longer service life and consistent quality with repeated use.
By default, the tools are supplied with a square drive connection, but other options are available, such as an external hex connection according to ISO 1173 E11.2 or E6.3, a slightly tapered connection according to DIN 228, or a DIN 3121 connection for larger sizes.
Description
Application & operation
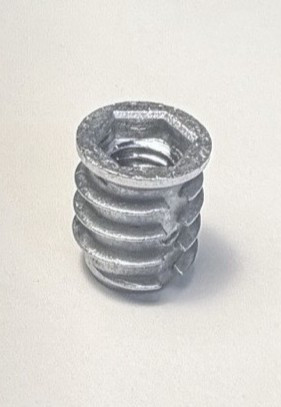
Which inserts is this tool suited for?
This tool is intended for screw-in metal inserts without drive (size range approx. M2 up to M20), self-tapping or self-forming.
How does it work?
-
Positioning and Depth Setting
Ensure that the workpiece is positioned so that the borehole and the machine spindle are perfectly perpendicular.
Adjust the machine to the correct installation depth — approximately 0.1 to 0.2 mm below the surface of the workpiece. -
Start the Operating Cycle
At the start of the rotation process, the outer rotating shaft of the tool must rest against the visible stop pins, allowing the pins to drive the tool clockwise. -
Feeding the Insert
Feed the screw-in insert on to the rotating tool, ensuring the slot or 3 cutting holes is facing downward.
Allow the tool to grip the insert for approximately 2 to 4 thread courses. -
Driving the Insert into the Borehole
Continue approaching the tool toward the borehole. Once the insert engages and begins cutting into the material, the remainder of the driving process proceeds without applying additional feed pressure.
-
Reversing and Finalising the Installation
Depending on the machine type, reversal may occur automatically via a limit switch or depth sensor. The 2 stop pins will unlock th etool from the installed insert.
Avoid applying excessive downward pressure when the tool contacts the workpiece — doing so may cause damage or breakage to both the tool and the insert.
Hard contact may also affect the precision fit of the insert and reduce its pull-out resistance.
If necessary, adjust the driving speed to ensure the reversal occurs at the correct moment.
Key benefits
-
Quick and simple installation without need for special adapters.
-
High repeatability and precision for each installation cycle.
-
Long service life, thanks to hardened tool materials.
-
User-friendly design for direct and reverse rotation use.
-
Compatibility with a broad range of insert types, diameters and lengths.
Specifications
Technical features
-
Suitable for mounting of self-tapping inserts and related models.
-
Designed for use with cordless drilling machines, tapping machines or any screwing device capable of reversing direction.
-
Available in various diameters and lengths to match different insert sizes (see data sheet).
Replacement parts
-
If the threaded end of the tool shows wear, simply replace the stud with part number 620 0XXX 70 rather than replacing the entire tool.
Why choose Juno Industries?
European specialist in threaded inserts
With over 20 years of experience in threaded metal insert solutions, Juno Industries delivers products across the EU. We offer technical support, fast delivery and customized solutions for industrial clients.
Service & support
Our technical team assists you in selecting the right insert type, correct drill size and most suitable installation tool.
Frequently asked questions about Mechanical tool for screw inserts
How can I reduce the wear of the replacement stud?
Small thread sizes are sensitive to wear. It is always a matter of finding the right balance between working fast enough and using as few replacement studs as possible when assembling larger quantities.
The factors influencing this are the applied tightening torque, the speed of rotation, how quickly the screwing tool can stop when the correct depth or the set torque is reached, keeping the tool properly aligned when held manually, and the hardness of the base material. Adjusting these parameters to your specific application is important during start-up and should be continuously monitored after the initial setup phase.
How to replace the replacement stud or adjust the thread length of the 620 insertion tool?
Simply pull off the shaft, as it is held in place by spring-loaded detent balls. Loosen the two set screws using the inner hex so the worn replacement stud of the insertion tool can be replaced.
Pay attention to the two flattened sides: these must be positioned correctly so that the set screws clamp against them when tightening.
Also check how far the external thread protrudes afterwards to ensure it is not longer than the length of the thread insert.